Photoshop: Brushes
There are a plethora of brushes available to you on photoshop. This guide will explain different brush settings, as well as how to install different brush packs here on deviantART. This guide is for pressure sensitive pen tablets. It is going to be much easier to do things with a tablet. Ones by Wacom are good, and you can get a bamboo for under 99$ USD.
Basic Brushes in Photoshop
It's important to stick with default ones to learn all the settings. You can do so many things with the hard round brush.
Bring up your brush palette in one of the following ways. (note I am in CS3, so the icons will look much older, but same thing. )
| Click for quicker editing options|
^
^
Click this.
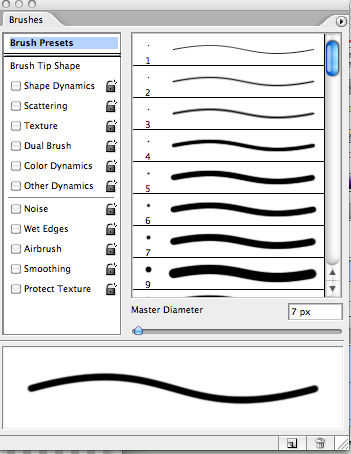
Clicking that will bring up:
Now, master diameter controls the size, so moving that slider will make your brush larger or smaller.
The keyboard short cut for this is [ and ]
[ : Smaller
] : Larger
Learning shortcuts increases your work flow efficiency.
You will come across many different control settings. Let's take a look at them right now.
I will recap at the end of the article, but look closely.
Control: options: 
Off: Set value will not jitter
Fade: Tapering
*Pen Tilt: Reacts to dips and tips and tiltawhirls of your pen
*Stylus wheel: This is not your mouse's scrolly wheel. It is a pen exclusive feature. Optional air brush pen.
*Rotation: Twisting and turning of your pen.
* Note: You need a pen and tablet for these settings.
. . . Got it? Good!
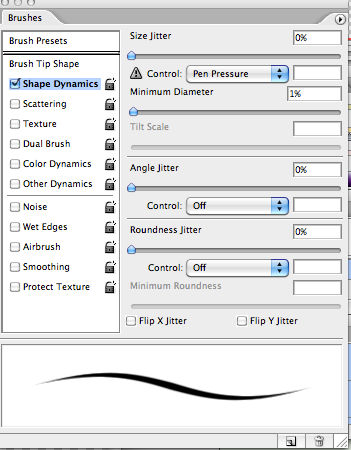
Shape Dynamics
Minium diameter controls how small the brush will go, increasing it will make the range of thicknesses smaller.
Useful if you want a steady line, with very little variation. Or you could just turn it off. Which is good when trying to detail with smaller brushes, or large ones. It depends what you want to do. Size jitter is very useful for fur/ hair, line work, sweeping lines... Not so much for buildings, solid edges.
Fade is self explanatory, and the other options aren't as commonly used. Do you really want to pen tilt as your size changer? Perhaps.
Scattering
Clicking the scattering check box will allow you to control your brush and make it speckly. You could use this for snow, rain, or random patterns for backgrounds. In photo manipulations, you could use this for texture.
You can chose the control, but pen pressure, or setting it to off so it does not jitter.
Count controls density of scatter. Less means sparser dots. You can also set this to a jitter.
Both axes means scattering on both x and y axis of the brush. You can experiment to decide what you want.
Texturing Your Brush
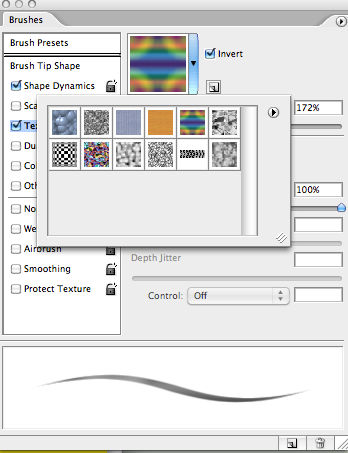
Clicking the thumbnail allows you to sample different textures. ( you can use your own if the presets are not enough for you)
Clicking the triangle allows you to see more options/ texture palettes.
However, once you're satisfied, return to this:
The mode you see is the blend mode. This determines how the brush will interact with the texture selected.
Depth controls how visible the texture appears inside the shape of the brush.
Playing around with texture each tip controls how the texture repeats itself.
Dual Brush
Double the fun!
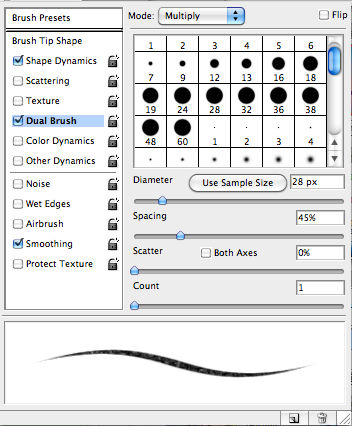
When this box is checked;
You can combine brushes.
Whatever brush is selected now is the 'base' brush for which you can mix in another brush.
Scroll down and select a second brush. This is where the dual in dual brush setting lies.
You can change the diameter and play around with scatter and spacing. (scatter: spread, spacing: well, spacing between blobs of digital paint. I suppose that's the simplest way to put it.)
Basically, you want to experiment. Whatever you desire.
This is a very useful option for adding textures, and mixing the best of both worlds/brushes.

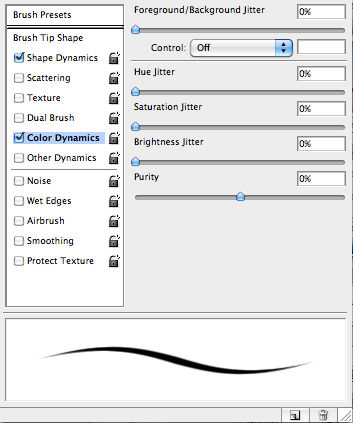
Color Dynamics
This interesting setting allows wonderful brushes that spaz out with color.
Foreground / background Jitter:
The peach color is your foreground color. Pink is the background.
Jitter will change how much it will mix/ change between those two colors.
You can change the control method. Fade and pen pressure are nice because you can be more precise.
Higher percentage means more of the foreground color will be mixed with the background color.
Hue Jitter allows for some exciting color changes. 
High percentage means more random hues, while a smaller hue jitter % will result in hue color close to the selected color.
Saturation jitter allows for difference in the saturation of the color.
Saturation: basically the pigment/boldness of a color.
Pure/ concentrated color without tinting/shades.
Brightness Jitter: % values change how bright or dark the color will become when you paint with it.
Purity controls the pureness of the color, which results in a muted, dirty sort of tone.
Experimentation is really useful. But it is fun to just paint around and let randomness take your breath away and inspire you.
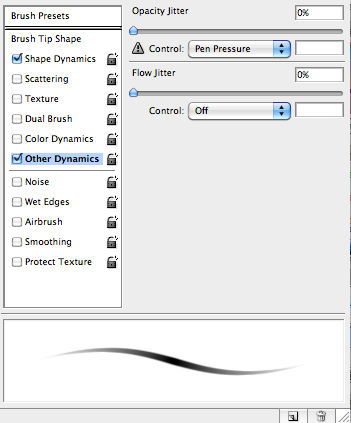
Other Dynamics
Control Option Recap!
Off: Set value will not jitter
Fade: Tapering
*Pen Tilt: Reacts to dips and tips and tiltawhirls of your pen
*Stylus wheel: This is not your mouse's scrolly wheel. It is a pen exclusive feature. Optional air brush pen.
*Rotation: Twisting and turning of your pen.
* Note: You need a pen and tablet for these settings.
Opacity and Flow
They are related, but not the same thing.
Opacity: Controls the Opaqueness (or transparency, depending on how you see things) of the brush stroke. (As a whole.. ) Basically maximum pressure/ opaqueness.
50% opacity means that it will take 2 strokes laid on top of each other to be completely opaque.
Flow: Controls the value rate of increasing/decreasing opaqueness of each brush tip. (single stroke blob )
50% flow at 100% opacity results in a lighter, easily controlled painterly stroke. (With pen pressure)
Experimentation is good.
Flow: Rate
Opacity: Max opaqueness.
Misc Settings (CS3. If there are more, you can ask me questions below.)
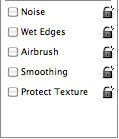
These:
Noise: Graininess in stroke.
Wet Edges: Imagine that you just dipped the brush in water. Wet edges are fuzzy and well, wet looking. (Transparent taper at the outer edges)
Air brush: Airy light paint effect.
Protect texture: Preserves texture already there.
Hopefully you found this article useful!
Further Reading:
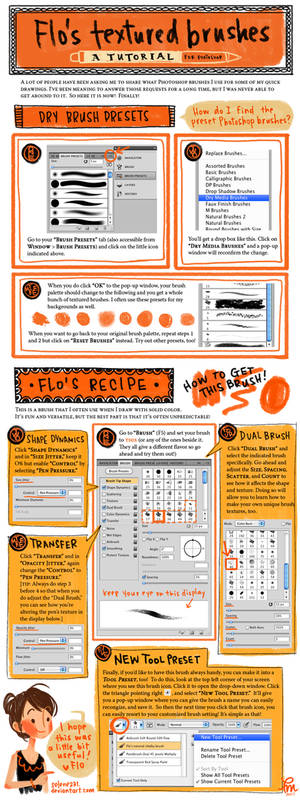
Useful brush tutorials:

If you have questions, I can answer and elaborate. Leave a comment below.
